Elegant floral arrangements - decoration of any site. Variegated flower beds, striking the imagination with the variety of colors and shapes of flowers, do not leave anyone indifferent. But to highlight the flower garden against the background of the lush vegetation of the site and emphasize its beauty is impossible without a decent frame. Do-it-yourself decorative flowerpots for the garden can not only transform the site, but also give the flower gardens a complete look.
Types of pots and their purpose
A distinctive feature of a flowerpot from a traditional plant pot is the absence of drainage holes in the bottom of the tank necessary for draining excess water. In addition to the decorative function, a properly selected container can facilitate the care of a green pet.

Since the main purpose of decorative flower pots for the garden is to decorate the interior, in most cases the outer surface of containers is decorated with a more beautiful and attractive
Depending on the material of making flower pots for the garden, there are the following types:
- Plastic One of the cheapest cache-pot options, the main advantage of which is light weight and easy care.
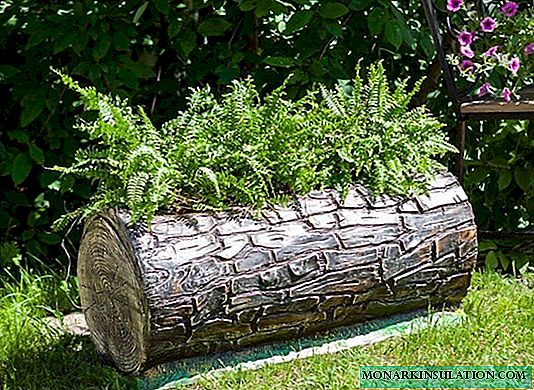
- Wooden. The natural base of the containers allows you to protect the roots of plants from hypothermia and drying out, as well as maintain optimal conditions for growth.
- Metal. Modern material, characterized by durability, is perfect for street gardening.
- Clay. A material with a rough or smooth surface is a universal basis for painting with paints and decorating with molding. But the ability to pass moisture limits its scope.
- Ceramic. Natural material processed with special glaze is widely used both in interior decoration and garden design.
The main requirements that are placed on the cache-pot for garden design are the ability to maintain the shape set by the master and high resistance to increased soil moisture and temperature extremes.

If we take the location of the improvised flower garden as the basis, then there are floor structures and hanging flowerpots for the garden
Unusual use for old things
Street pots can be made from anything. Old rubbish, carefully stored "just in case", furniture, dishes, can go into business.

Unusual hanging pots can be made from old kettles, which are enough to place along the stairs, hanging on a wire

In the hands of a creative owner, even an old travel suitcase without a handle can find a second life, which, as the saying goes, is hard to carry, but it’s a pity to throw it away

A wooden box opened with a stain and decorated in the shape of a cute fairy tale calf will become a worthy setting for a flower garden
It is easy to fill the suitcase by setting several pots of plants directly in it. If the height of the containers is significantly lower than the walls of the suitcase, you can pour sea pebbles and pebbles on the bottom of the pot, and fill the gap between the containers with moss or crushed bark.
Options for self-making pots
For the manufacture of original containers that can organically fit into the landscape design and make it a spectacular decoration, you can use a wide variety of materials: burlap and rope, the remains of a plastic film and plastic bottles, gypsum and polymer clay ... Any of these materials in the skilled hands of a master can turn into Bright element of garden decor.
Plaster decorative vase
To make the original planter, which will last more than one year, you need to prepare:
- asbestos or polymer gypsum;
- flexible wire for arranging the frame;
- construction bandages or strips of fabric 10 cm wide;
- water-based paints and colors;
- acrylic varnish for outdoor use.
The cache-pot can have any form: it all depends on the chosen basis for the frame. In our case, a plastic bucket with a volume of 10 liters will act as a temporary basis, which will be removed upon completion of work.
We install the bucket on a flat surface, turning it upside down. To make the frame, we wrap the surface of the bucket with wire, the edges of which are neatly tucked and hidden. The resulting frame is removed from the bucket. Now you can start breeding gypsum, the consistency of which in finished form should resemble thick sour cream. In a container with gypsum solution we lower strips of fabric or bandages, soaking them for 2-3 minutes. Our task: to cover the wire frame on the outer and inner walls. Stripes of fabric, well soaked with a solution, lay out layer by layer on the frame until the wall thickness reaches 1.5-2 cm. Carefully coat the pots with the remaining solution. The design is left to dry completely for 12 hours.

After the base has completely hardened, you can start decorating the cache-pot, decorating it with all kinds of pebbles, colored glass and beads
To do this, first level the surface, cleaning it with sandpaper. Then we cover the bottom and walls of the product with white water-based paint, on top of which with the second layer we put the desired background for the application or ornament.
Hanging cache-pot from a tire
An old car tire is an excellent material for making decorative elements. Rubber is resistant to external influences and adverse weather conditions, due to which it is able to regularly serve more than one season.

It's hard to believe that such a colorful parrot, which sways importantly under a canopy at home or between tree branches, can be done in just one day with your own hands.
To make a hanging planter you will need:
- tire without metal cord;
- drill and drill with a diameter of 10;
- sharp knife;
- M8 washers, bolts and nuts;
- paints for outdoor use.
To facilitate work when cutting parts, the knife blade can be periodically wetted with liquid soap or detergent.

2/3 symmetrical cutouts are made along the side wheel on both sides of the tire. In the larger side of the incised tire, we separate the lateral part through triangular cutouts

As a result, a workpiece should be obtained, which is then carefully turned inside out, giving the desired shape
The body of the parrot is ready: it remains to shape the head of the bird and give it a recognizable shape. To do this, cut the beak from the tire scraps.

We cut the parrot's beak into a longitudinal incision made with a sharp knife along the edge of the lower side of the body
To securely fix the beak, we squeeze both halves with the help of a hammer, drill a through hole through them, through which we then tighten them with a bolt. You can correct the shape of the bird already in place by making several cuts with a knife.

From the long side of the workpiece along the contour previously outlined in chalk, cut the tail of an exotic bird
The parrot is ready: it remains to pull together the side parts of the product with a rope or wire, and then paint it in bright colors.
Floor flowerpot made of twigs
For work, branches 0.7-1.5 cm thick and a thin cord or twine will be required. If possible, it is better to give preference to branches of birch, viburnum and bamboo - they look the most interesting. Sticks are better to choose the same thickness.
For the manufacture of flower pots, branches with a knife or secateurs are cut approximately the same length, which should be 1-2 cm above the pot itself. We lay the sticks-blanks close to each other on a flat surface and braid with twine so that a mat is obtained, the length of which should be sufficient to wrap around the pot.

Thin tree branches remaining after trimming the garden can be used as decoration elements. They can serve as the basis for the manufacture of a beautiful flower pot, which is perfect for decorating both the site itself and the interior of the house.

To create a larger design, it is better to use bamboo, or bars of round or square section, assembled in the form of a cube
Step-by-step video tutorials
A convenient option is when the branches are glued to the burlap base. We wrap the outer walls of the pot with a woven mat and fix the decoration with the help of colorful satin ribbons or the same twine.