To grow a fruiting tomato bush - it seems, well, what’s wrong, a common thing. But just think about how much potential is in the seed. It's just some kind of miracle. Planted a small seed, and a large plant grew, strewn with delicious fruits, smelling fragrant under the bright rays of the sun. But to achieve this result, you need to work a little. And you need to start, of course, with seedlings. The popularity of this method of growing tomatoes gave gardeners a lot of different methods. Among them are traditional and very unusual. And in order not to get confused, we’ll try to put everything on the shelves.
Rules for planting tomatoes for seedlings
Almost every gardener, no matter in which climatic region of our large country he lives, prefers to grow tomatoes in seedlings. This method is optimal for planting tomatoes in open ground, and when growing in a greenhouse. It is the seedling method that allows you to fully reveal the varietal advantages of the plant, to get the crop much earlier and in larger quantities, which is especially appreciated where the summer is short.

It is the seedling method of growing tomatoes that is considered the most popular in different climatic regions
Before planting the seeds need to be prepared. This procedure will take some time, but it must be done. Seed disinfection helps increase resistance to disease, and soaking will accelerate germination. Most often, for the treatment of seeds, the means available in each house are used:
- potassium permanganate;
- hydrogen peroxide;
- aloe juice;
- honey.

Honey and aloe are indispensable helpers in preparing tomato seeds for planting
But, besides this, chemical preparations also show good results:
- Epin;
- Fitosporin;
- Baikal EM1.
The types of preparation of tomato seeds before planting seedlings also include:
- hardening;
- warming up;
- sparging.
Such a large number of preparation methods does not mean at all that the seeds must be exposed to everyone. Bubbling, for example, is a great way to provide seeds with friendly hatching and germination. In this case, the seed material is no longer necessary to soak and use growth stimulants.

The process of bubbling helps stimulate vital processes in the seeds.
The timing of sowing seeds for seedlings depends on many nuances:
- region of residence;
- Features of early ripening varieties (early ripening, middle or late varieties);
- time spent on preparing seeds for planting;
- recommendations of the seed producer, which are indicated on the package.
Many gardeners prefer to focus on the lunar calendar, indicating the most suitable dates for sowing seeds for seedlings.
Table of average indicators of sowing tomato seeds for seedlings in different climatic regions
| Region | When to plant early grades | When to plant middle and late grades |
| Northwest | March 1-10 | February 25 to March 5 |
| The middle strip of Russia | March 10-15 | March 1-5 |
| Southern regions | February 10-15 | February 1-10 |
I live in Crimea. But even we prefer to plant tomatoes not seeds in the ground, namely seedlings. In late April - early May, markets offer a huge selection of different varieties of tomatoes that need to be planted before the heat. But I usually grow seedlings myself. Sowing seeds in early February, and before planting in the garden, I harden seedlings on the balcony.

Seedling method allows you to get tomato fruits earlier and prolongs the period of fruiting
Seedling Care
If comfortable conditions are met, the seeds will sprout together, after which they need to be provided with competent care.
Watering
Seedlings are more sensitive to underfilling or excess water than adult seedlings. When conducting watering, you must follow the following rules:
- after planting the seeds, the first watering is carried out on 2 or 3 days after the appearance of more seedlings;
- seedlings are watered strictly under the root or poured water between the rows;
- watering is carried out only with warm water (23 ° C).

When watering tomato seedlings, try not to get on the leaves and stems of the plant
After mass germination, seedlings are often watered - once every 3 to 4 days, adjusting the frequency in accordance with the air temperature and the speed of drying of the soil. After a pick, watering is carried out on 3-4 days. The frequency of watering dive seedlings is 1 time in 7 to 10 days.
Top dressing
The first feeding of seedlings is carried out when the first true leaflet appears on seedlings. To saturate the tomato with the necessary microelements, you can use complex fertilizers - Effekton, Agricola, Athlete or Nitrofoska. Also, for feeding seedlings, you can use wood ash or yeast. The second top dressing is carried out 1.5 weeks after the dive.
In addition to root dressing, it is possible to carry out foliar. In the case of a lack of trace elements, and as a result - poor seedling growth, this method will help to saturate plants faster with the missing substances. You can spray with the same fertilizers that are applied by the root method, but the solution is prepared less saturated. A few hours after spraying, it is recommended to spray the seedlings with clean water from a spray bottle.

Foliar top dressing will allow you to quickly replenish the lack of trace elements
Pick
For tomato seedlings, this procedure is very important. It helps the seedling build up a sufficient root system, allowing you to get more nutrients and moisture.
Typically, the procedure is carried out on 10-14 days after germination. By this time, the seedling should already have at least 2 real leaves.

Tomatoes are one of the few plants that can easily tolerate the picking process.
Dates of transplanting tomato seedlings into the ground
Before transplanting into the soil, seedlings need to be hardened. To do this, within 1.5 weeks, take out the plants on the balcony or street.
If you live in a cold region, then begin hardening by increasing the airing time, but do not leave the plants in a draft. Then the seedlings can be taken out to the covered balcony.
The timing of planting seedlings in the soil depends on the climatic conditions of the region. In the southern regions, this event is held early - from the end of April and throughout the first half of May. At this time, the sun has already heated the soil to the desired 15 ° C. But at night the temperature can sometimes drop sharply, so it would be nice to have a light shelter on the bed, which at night will protect the rooted seedlings from cooling.
In cooler regions, for example, in the Urals or Siberia, landing is carried out much later since the end of May and even capturing the beginning of June. Daytime temperatures in these areas, however, as in central Russia, are far from comfortable, so often seedlings are immediately planted under a film cover.

Transplant only hardened seedlings and on time
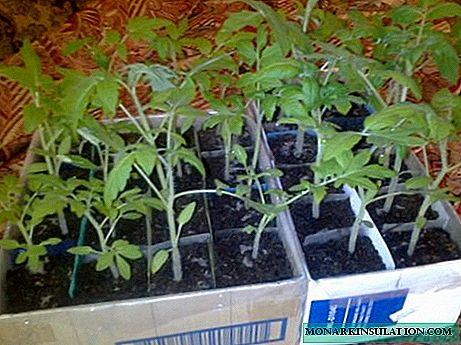
Methods for growing tomato seedlings
There are a lot of ways, options and methods for growing tomato seedlings. Some of them have been tested for a long time and enjoy well-deserved popularity, some of them are only being tested by curious gardeners. But they all have one goal - that the seedlings grow strong and healthy.
Growing seedlings without picking
In the usual cultivation method, the seeds are sown in a common box, wait for seedlings to appear and at the right moment they are dived into separate pots. To grow tomato seedlings without picking, the seeds are immediately sown in individual containers or use a box with partitions that will prevent the roots from intertwining, which will greatly facilitate transplanting into the soil.
The advantages of growing without a pick are obvious:
- time is saved that the gardener can spend on better seedling care;
- the main core root, which is not pinched in this case, can penetrate very deep into the soil layers. Thus, the plant tolerates dry periods easier and independently provides itself with moisture;
- tomatoes without picking grow more resistant to various adverse weather conditions.
So, we will consider several options for growing tomato seedlings without a pick.
Landing in separate containers
First you need to prepare a suitable soil mixture. For seedlings, loose and nutritious soil is most suitable, which is easy to prepare independently, mixing in equal proportions garden soil, humus, wood ash and sand.
- Separate containers (they must have drainage holes at the bottom) fill the soil mixture with 1/3. Why so little soil is required, you will understand very soon.

Fill each cup with soil at 1/3 of the height
- Moisten the soil well and bury prepared seeds in the amount of 3 pieces in it for 1 - 1.5 cm.

Plant 3 seeds in a glass
- After emergence, give them time to grow a little, and then remove the 2 weakest seedlings. No need to pull them out of the soil so as not to damage the roots of the remaining seedling. Just cut with small nail scissors.
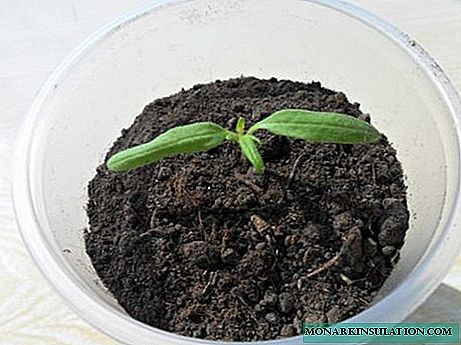
When the seedlings grow up, leave only one of them, but the strongest
- As the seedling grows, add soil to the tank (you just have free volumes for this). Thus, the seedlings will grow additional lateral roots.

As the seedling grows, add soil to the tank so that the lateral roots develop


Growing seedlings in boxes
To grow a large number of seedlings or in the absence of a sufficient number of individual containers, you can use a box (wooden or plastic). The main thing is that it is not low.
- Pour soil mixture into the box, about 1/3 of the volume, moisten and plant the seeds.

Moisten the soil evenly with a spray gun
- The distance between the seeds in this case should be quite comfortable, taking into account the further growth of the seedling - approximately 5 - 7 cm.
- After the seedlings are slightly extended, install a partition between them from cardboard or plastic. Due to this, the roots of the plants will not interweave and be injured during transplantation.
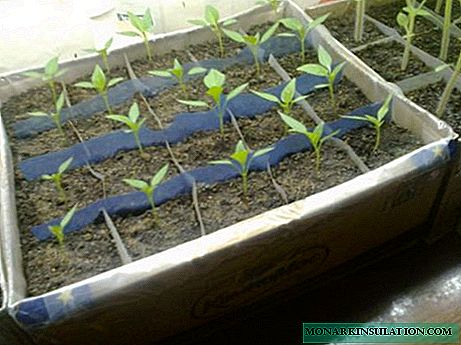
When the seedlings appear, be sure to install partitions to separate the plants from each other
- In the process of seedling growth, a soil mixture must be added to each cell.
As seedlings grow, evenly add soil to the boxes


Growing tomato seedlings in cups made of cellophane or plastic film
Quite an economical method, because all that is needed to create an individual container is pieces of a cellophane film (it is better to take a thick one), measuring 15 cm high and 25 cm wide.
- Roll cellophane in the form of cups. For better fixation, you can grab the edges with a stapler.
To prevent the edges of the improvised cup from parting, strengthen them with wire or a stapler
- Fill the container with moist soil and place it firmly on the pallet.

Fill the cups tightly with filled cups.
- Plant 3 seeds in each improvised container.
- Then proceed as if seedlings were grown in separate cups.


When I was little, it was impossible to find pots for seedlings, and my mother made such containers from a dense plastic film. By the way, they served 2 or even 3 years. But cups for seedlings were made in those distant times from any material suitable for this - cardboard, newspapers, magazines.

From paper folded in several layers, a wonderful container for seedlings is obtained
Growing in peat tablets
An easy and convenient way to grow tomato seedlings is to use peat tablets. But the tablets need to be selected the right size - at least 4 cm in diameter. For convenience, it would be nice to purchase a container for peat tablets. But you can do without it, using the plastic transparent packaging from biscuits or cakes available in each house.
- Peat tablets are placed in a container, and pour warm water (40 - 50 ° C).
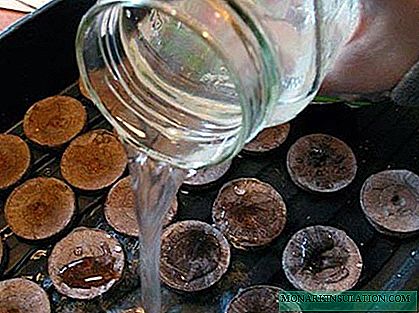
Pour peat tablets preferably with warm water
- In the middle of the swollen tablet, make a centimeter indentation and place a tomato seed.

Sow a seed into a swollen tablet, you can even 2
- Sprinkle the seeds on top of peat and cover the container with a lid.
- After 3 to 4 true leaflets appear, you need to carry out a procedure similar to a pick.
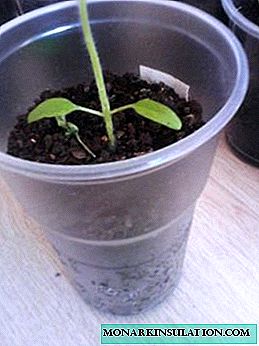
- Take a large plastic glass with a volume of at least 0.5 liters, make a hole in the middle to drain excess water. Pour about 2 to 3 cm of soil into a glass.
The glass for transplanting should be large so that the seedling has a place for growing roots
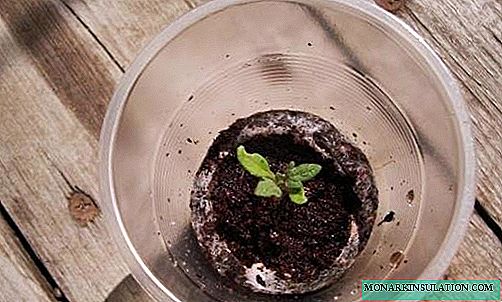
- Then remove the mesh from the peat tablet and place the seedlings in a glass. Add soil before the cotyledon leaves begin to grow.

The net from the peat tablet is easy to remove, but you need to act carefully
- If you leave the seedlings in a peat tablet until it is planted in the ground, then the plant will begin to stretch, it will be very weak. And in a glass there is enough space for the development of the root system.


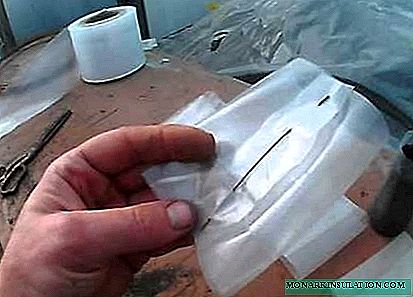
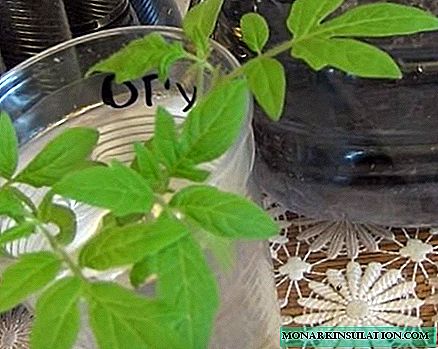
Tomato "snail"
This method is very popular, as it saves space on the windowsill. In addition, the seedlings in the "snail" are easy to care for - to moisten, it is enough to pour water into the tank, the illumination is controlled by turning the structure around its axis. Another such method attracts with its availability and low cost.
There are 2 ways to grow tomato seedlings in a "snail" - using land or toilet paper. Consider each of them, so that you decide which one will be most convenient for you.
For the manufacture of "snails" with soil will need the following materials:
- waterproof substrate for the laminate with a width of 10 - 15 cm and a length of 1 - 1.5 m;
- soil mixture for seedlings;
- an elastic band or adhesive tape to fix the "snail";
- atomizer;
- spatula or spoon for soil;
- ruler;
- tweezers;
- capacity for the "snail" (its walls should be slightly higher than the "snail" itself).
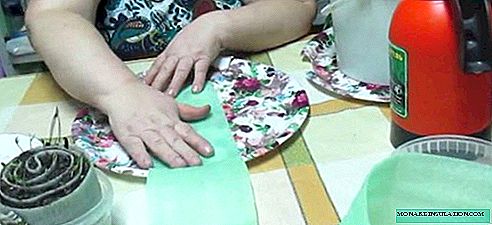
In order not to soil the work surface, place an old oilcloth or newspaper, and then proceed.
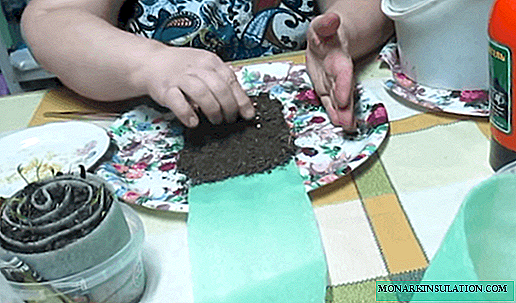
- On a flat surface, spread the tape from the backing. Using a spatula, pour lightly moistened soil onto it, stepping back 5 cm from the beginning of the strip. The layer should not exceed 1 cm in height. So that the soil does not crumble, tamp it lightly with your palm. For convenience, fill the soil with no more than 20 cm of the substrate in length.
The substrate for the laminate does not creep away from moisture, so it is ideal for making a "snail"
- From above, moisten the soil layer again with a spray gun. But remember that the earth should not be too wet, otherwise it will float.
- Having departed from the upper edge of 2 cm, begin to lay pre-prepared seeds with tweezers. The distance of 2 cm, which should be between them, is easy to measure with a ruler.
Spread the soil with a centimeter layer, otherwise it will be inconvenient to fold the "snail"
- When laying the seeds, press gently into the ground.
- As the tape fills with seeds, start folding the "snail", trying to make the roll denser.

As you lay the seeds, start rolling up the roll
- Holding the rolled edge with one hand, with the other hand, fill the soil in the next section, spread the seeds, and then twist on.
- At the very end, leave 5 cm of soil free of soil.
- Fasten the finished roll with rubber bands or scotch tape and place it in the container, seeds up. Pour water into the container, about 2 cm. You can moisten the soil from above with a spray bottle. To create comfortable conditions for seeds, put the bag on the container with a "snail".

Ready-made "snails" set in containers with high sides


"Snail" without soil
The materials for its manufacture are the same, but instead of soil you will use toilet paper. The substrate is often replaced with a simple cellophane bag. In the case of growing in a "snail" without land, do not take a piece of cellophane too long, 50 cm will be enough.
The manufacturing process of such a "snail" almost copies the previous process. Only on the substrate you need to lay not soil, but toilet paper. Concerning layers, opinions differ. One layer is enough for some, while others recommend at least 4 layers.
- Moisten the paper from a spray bottle or syringe with an Epin solution (concentration as for soaking the seeds), but also with plain water. Place the seeds as described above, cover with another layer of paper on top, moisten slightly and twist the "snail".
- Put the rolled roll in a container with a nutrient solution and cover it with a bag.

"Snail" without soil is made much faster
If you get the hang of it, the process of folding the tomato "snail" will not take much time. When growing in this way, you should remember some rules that are common to each of the methods:
- do not let the soil or toilet paper dry;
- the shelter must be periodically ventilated to avoid high humidity;
- after the first shoots appear, the cover package must be removed.
How to grow tomato seedlings in a plastic bottle
For this method of growing tomato seedlings, you will need a 2 or 6-liter bottle (preferably transparent). It needs to be carefully cut in half lengthwise.
- After that, put a thick layer of toilet paper (at least 7 layers) in the bottle. Lay in layers, periodically spraying with water.
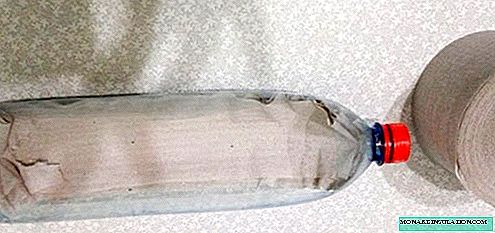
Put several layers of toilet paper in the prepared bottle
- Place seeds on the wetted surface of the paper that have begun to hatch.
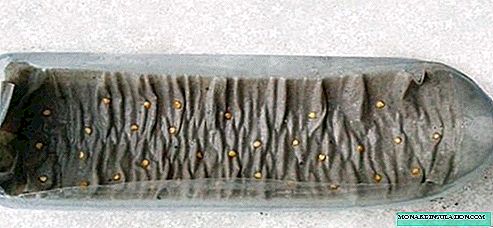
Spread the seeds on wet paper
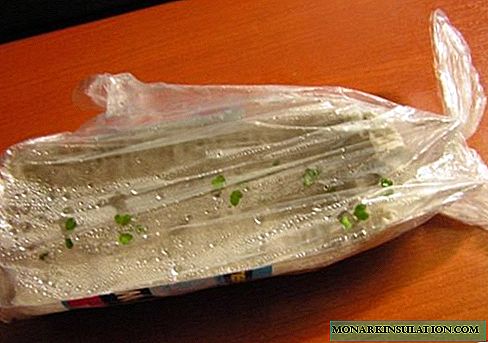
- Put another layer of toilet paper on top and moisten it from the spray bottle.
- Place the seed bottle in a transparent bag and periodically ventilate the unusual nursery.

To create a comfortable environment, put a bag on the bottle
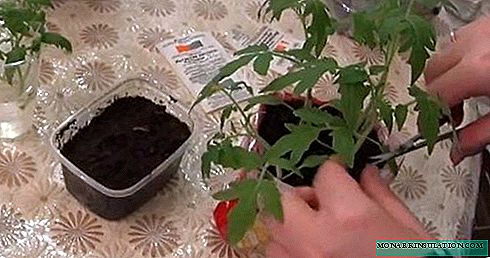
- Seedlings grown in this way require mandatory picking.
When the seedlings grow up, dive them into separate containers


If someone prefers to grow seedlings in the soil, then the bottle can be adapted for such an experiment.

Bottle replaces a small box for seedlings
Instead of a bottle, it is quite possible to use another plastic packaging, putting various fillers into it. You can also experiment with the filler. Some gardeners for growing seedlings use the following materials:
- vermiculitis;
- perlite;
- coconut fiber;
- sand.

Plastic packaging is an excellent nursery in which you can grow seedlings on paper or in soil
"Moscow" method of growing tomato seedlings
In fact, the "Moscow" method of growing tomato seedlings is the same "snail" without land. Therefore, a piece of cellophane or plastic film and toilet paper (or maybe a napkin) is all that is needed in order to grow tomato seedlings using this method.
Seedlings "in Moscow" is also called the method of agronomist Karimov.
The manufacturing process of the roll “in Moscow” is no different from the “snail” method described above. You can experiment with liquids that wet the paper. Instead of plain water, you can use one of the following means:
- a solution of 3% hydrogen peroxide - per 1 liter of water 20 ml of peroxide;
- fertilizer solution "Humate Baikal", concentration for soaking seeds.

Seedlings "in Moscow" - a clean and economical way of growing
Put the rolled up roll into a container filled with nutrient solution (concentration is 2 times lower than usual). Clean and space saving! But do not forget that tomato seedlings should be dived in this case. This must be done carefully so as not to injure the roots. Expand the roll, cut off a strip of paper with ingrown roots with scissors, and in this form, plant a seedling in a container with soil.

When it’s time to pick, just expand the roll and cut it into separate squares with seedlings
The "Japanese" or "Chinese" way of growing tomato seedlings - this is a must see!
According to many Internet sources, this method has nothing to do with Japan or China, because it was used both in the countries of the USSR and abroad. But that is not the point. The main thing is to properly grow seedlings using this technology.
Seedlings are grown in the usual way - in a box or other container with soil. The eastern method is interesting in the way of diving. It is carried out not in the traditional way, but in a very unusual way. Before the procedure, prepare everything you need:
- capacity with Epin solution;
- separate containers with soil for seedlings;
- scissors are small but sharp.
The procedure is subjected to seedlings, which turned 30 days old. At this age, the seedling is already quite developed and has several true leaves.
- Scissors cut seedlings at ground level.
With sharp scissors we cut seedlings at the soil level
- Put the cut plant in the Epin solution. You don’t need to hold for a long time - just as long as you prepare the tanks.
It’s not necessary to keep a cut plant in Epin for a long time
- Moisten the soil in the tanks and, after making a deepening, plant the cut seedlings, deepening it on the cotyledon leaves.
We deepen the cut plant exactly on cotyledon leaves
- After this, the soil can be shed with the Epin solution, in which the cut plants were located.
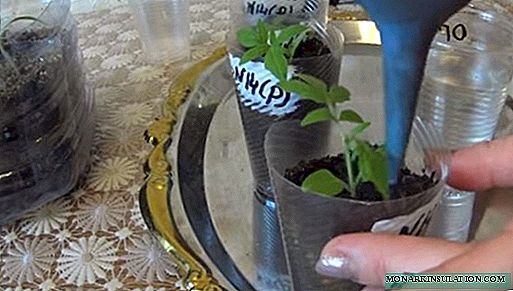
We water the seedlings of Epin so that the rooting process is successful
- Cover containers with transplanted seedlings with a transparent bag or glass and place in a dark place for 3 to 5 days. After this period, return the seedlings to the usual place.

To create favorable conditions for rooting, cover the seedlings with a glass or bag


When using the "Chinese" or "Japanese" method of growing seedlings, seeds must be sown almost a month ahead of schedule. Oriental methods are often used to root excessively long seedlings.
Of course, this is not a complete list of all possible methods of growing seedlings. After all, you can’t refuse your wit to our people. Almost everything is used - toilet paper sleeves, eggshells, packaging for juice, milk, egg trays. If you are an experienced gardener, you probably have a couple of secrets left.

For growing seedlings, the gardener can adapt what any other would have long taken to the trash
Growing problems, possible diseases and seedling pests
In the seedling stage, tomatoes rarely get sick or suffer from pests. Nevertheless, careful home care for young plants affects. But too zealous duties of a caring vegetable grower or lack of proper care for seedlings can lead to problems.
Table: how seedlings tell us about nutritional imbalance
| Sign | Which item is missing |
| The leaf blade has turned yellow and the veins remain green | Iron deficiency that may occur due to excess potassium permanganate |
| Roots rot, leaves become bumpy | Calcium deficiency |
| Leaflets become wrinkled | This occurs with an excess of potassium, which interferes roots absorb potassium |
| Leaves lose elasticity | Copper deficiency |
| Pale leaf color | Nitrogen deficiency |

As a rule, with thickened plantings, tomato seedlings lack nitrogen.
In addition, improper care leads to the following consequences:
- seedlings are too stretched - insufficient lighting. To correct the situation, place the seedlings on the most lighted window or turn on additional lighting;
- the roots rot or dry, the plant becomes sluggish, the leaves lose turgor - irrigation is violated. Subject to the frequency and norms of watering, such a problem will not happen;
- midges (sciaridae) appear in the soil - excessively moist soil that is not sanitized before planting. To get rid of pests you need to sprinkle soil with a layer of ash or place glue traps on its surface. A pair of garlic cloves buried in a box with seedlings will scare away the pest. If all these methods do not help, then you have to treat with Dichlorvos.

So that the seedlings do not grow one-sided, turn it to the light source in different directions
The diseases that most often defeat seedlings are the black leg and late blight. As a rule, these fungal infections develop with excessive watering and thickened plantings. Remove diseased plants from the soil immediately with the roots. To prevent the development of these infections, treat the seeds before planting, and spill the soil with a solution of manganese or copper sulfate.

Heat and high humidity - a favorable combination for the development of the black leg
What can not be done when growing tomato seedlings
To seedlings turned out strong and healthy, approach its cultivation with full responsibility.
- Do not buy seeds from strangers. Before sowing, be sure to process the seed.
- You can not soak the seeds for more than 10 hours, otherwise the embryo may simply suffocate.
- Do not use cold water for soaking, only warm.
- Do not let the air temperature drop until the first shoots appear.
- Do not over-moisten or over-dry the soil in which the seedlings grow.
- Do not allow thickening of landings.

Strong and healthy seedlings are the key to a good harvest
There are many ways to grow tomato seedlings. And each of them has its own characteristics, advantages and disadvantages. To find the most convenient, you have to analyze the methodology and experimentally determine the one that suits you. And maybe it’s you who succeeds in improving some of the already known methods or inventing something new.