Any gardener who grows strawberries on his plot knows how much work needs to be put into caring for this crop, and therefore wants the result to justify them. In this case, you can pay attention to the strawberries of San Andreas.
A Brief History of the San Andreas Strawberry Variety
Strawberry San Andreas was created by California breeders in 2002 based on the popular Albion variety. Gardeners say that San Andreas is an improved version of his "big brother." This strawberry has been widely used since 2009.
General characteristics
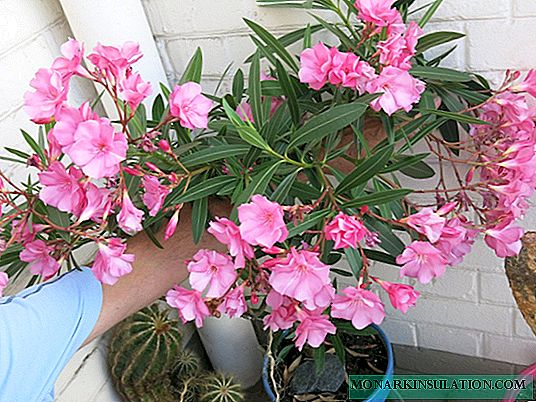
Strawberries San Andreas belongs to the repair varieties (it can bloom and bear fruit several times a season, usually 3-4). The plant forms a compact medium-sized bush with a powerful root system and small light green leaves. Peduncles usually no more than 10. Mustache education is weak. At high temperatures, fruit bearing is suspended.
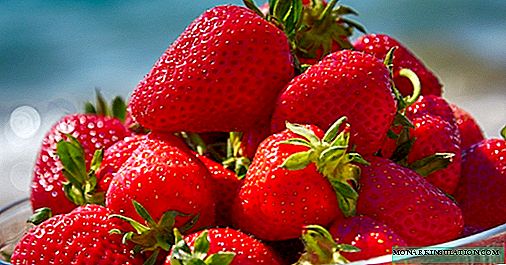
Fruits of conical shape, rounded at the end, bright red, shiny, with sunken seeds. The pulp is red-orange, is hard. The weight of berries is 20-30 g, individual specimens can reach 50 g.

Strawberry San Andreas has an attractive appearance and excellent taste.
Advantages:
- high productivity. From one bush you can collect from 0.5 kg to 1 kg of berries;
- prolonged fruiting. The variety is able to bear fruit even with a decrease in solar energy. Thanks to this quality, you can receive fruits from June to October;
- high quality fruits. The berries are sweet, with a slight pleasant acidity. Due to their density they are perfectly transported and stored;
- immunity to brown spotting and anthracnose.
Disadvantages:
- the inability to propagate strawberries with mustache or seeds. San Andreas practically does not form a mustache, and since this strawberry is a hybrid, the plants grown from the removed seeds will not have parental properties;
- zoning. Strawberries of this variety prefer a warm climate, so it is more suitable for cultivation in the southern regions. In cold areas, San Andreas is best grown in a greenhouse;
- need for care. Neglect of agricultural activities will significantly reduce productivity;
- short life span. 3-4 years after planting, you need to update the berry.
Video: Strawberry San Andreas
Strawberry Seedlings: basic rules for preparation and planting in the ground
There are several procedures that must be performed in order to get healthy and high-quality strawberry seedlings.
- Disinfection. Place the seeds in a bright pink potassium permanganate solution for 30 minutes and mix gently. Then remove and rinse them thoroughly in clean water. Dry lightly on a napkin.
- Soak. Since San Andreas belongs to large varieties, it is advisable to soak its seeds before sowing in order to facilitate their germination. To do this, spread the seeds on a well-moistened cotton cloth, place it in a plastic bag and put it in a warm place for 2 days. Care must be taken to keep the fabric moist during this time.
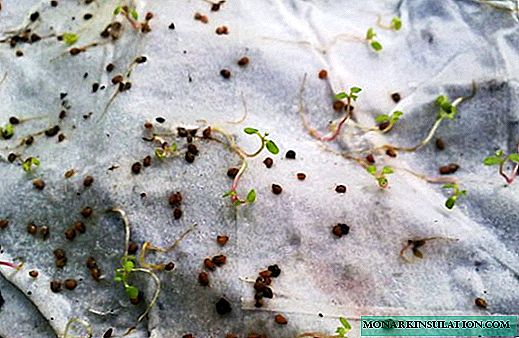
Large strawberry seeds germinate better after soaking
- Seed stratification. If you want to get early strawberry seedlings, you can stratify the seeds. This procedure should be carried out in November. Follow the same steps as when soaking, and then put the bag or plastic container with the cloth in the refrigerator on the lower shelf. Seed stratification lasts 2 months. Remember to keep the fabric moist.

Stratification of seeds allows you to get early seedlings


Water for all procedures with seeds and seedlings should be warm and soft.
Sowing seeds
Sow strawberries for seedlings to begin in March. If you want to plant seedlings in August, you can sow strawberries at the end of May.
Prepare the ground. Mixtures may be as follows:
- compost (3 parts) + garden soil (3 parts) + wood ash (0.5 parts);
- humus (5 parts) + sand (3 parts);
- peat (3 parts) + sand (3 parts) + vermiculite (4 parts);
- sand (3 parts) + garden soil (1 part) + humus (1 part).
Before sowing, it is desirable to decontaminate the soil, warming it for 1 hour at a temperature of 90-120aboutFROM. After disinfection, you can also remove it in a warm place for 2-3 weeks, so that beneficial bacteria reappear in it.
Strawberries need to be sown first in one common box with a height of no more than 15 cm, and then shoot the shoots in separate containers.
- At the bottom of the tank, make several drainage holes and pour fine gravel or expanded clay with a layer of 2-3 cm.
- Fill the drawer with prepared substrate about halfway.
- Moisten the substrate from the spray gun.
- Using tweezers, carefully lay the seeds 3-4 cm apart. You do not need to fill in seeds - strawberries sprout well in the light.
- Cover the box with transparent film, after making several ventilation holes in it, and put it in a warm, bright place, avoiding direct sunlight.
- Humidify the soil with a spray gun as needed.

Strawberry seeds do not need to be deepened
Shoots appear after 2-3 weeks. If you have stratified the seeds, then this period is reduced to a few days or 1 week. After the emergence of sprouts, air the “greenhouse” for 2-3 hours, gradually increasing the time. It will be possible to completely remove the film when at least two true leaves appear near the seedlings.
Seedlings need to provide enough light. To do this, install a fluorescent lamp so that light falls from a height of 20 cm.
While the seedlings are under the film, water droplets will form on its surface. Try to avoid getting moisture on the seedlings, so change or wipe the film, and water with a spoon or using a syringe under the spine.
Picking seedlings
Strawberry seedlings can be dived into separate containers after 3-4 true (serrated) leaves appear.
- Prepare containers (peat pots, plastic cups).
- Make drainage holes at the bottom and sprinkle some crushed expanded clay or fine gravel.
- Fill the containers with a substrate and moisten it. Make a hole in the center.
- Pour the soil well in a common box and carefully remove the strawberry shoot by the cotyledon (oval) leaves. Pinch the spine.
- Carefully place the sprout in the prepared hole and carefully sprinkle the roots, making sure that the apical kidney remains on the surface.

Dive should be done carefully, taking care not to damage the roots

In the future, seedlings need timely watering and top dressing with complex preparations, for example, Mortar or Kemira. It is necessary to carry out such dressing every 10-12 days.
Seedling diseases
Small plants can be affected by pests and diseases:
- blackleg. Strawberries can suffer from excessive moisture. Symptom is the blackening of the stem at the base. Subsequently, the stem softens, breaks, and the plant dies. If you notice this on your seedlings, then pick it up in separate containers with disinfected soil and put it in a warm, bright place. After 1-2 days, treat the soil with Fitosporin or Bactofit;
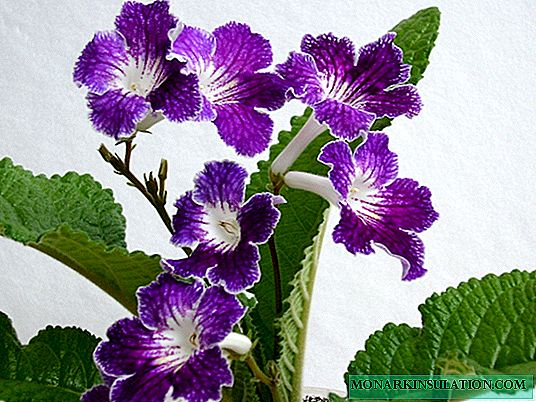
- powdery mildew. The infection will be indicated by a light coating on the leaves, which will then darken, and the sprouts themselves will weaken and die. In this case, destroy all diseased shoots, and treat healthy seedlings with Fitosporin or Planriz;
- spider mites. Their presence can be judged when silver or light yellow spots appear on the outside of the leaves and white spots on the inside. In addition, you may notice a membrane between the stem and leaves. In the fight against ticks, use the preparations of Karbofos, Aktara, Fitoverm.
Preparing the Strawberry Bed San Andreas
In order to ensure the best conditions for the development of a strawberry, it is necessary to properly prepare the garden.
Good predecessors for strawberries are calendula, garlic, parsley, mustard and carrots. In the place where raspberries, cucumbers, potatoes and cabbage used to grow, it is undesirable to arrange a berry.
For strawberries, San Andreas is suitable for elevated well-lit area with light sandy loam or loamy soil. To protect the plantings from sudden gusts of wind, place them between the bushes of currants or gooseberries. Also consider the level of groundwater - the depth of their occurrence should be at least 1.5 m.
Bed preparation:
- Dig a pitchfork and remove all weeds.
- On 1 m2 Add a bucket of compost or humus and 5 kg of ash.
- A month before planting seedlings, add 20 g of potassium salts and 40 g of superphosphate to the soil (per 1 m2).
Types of beds:
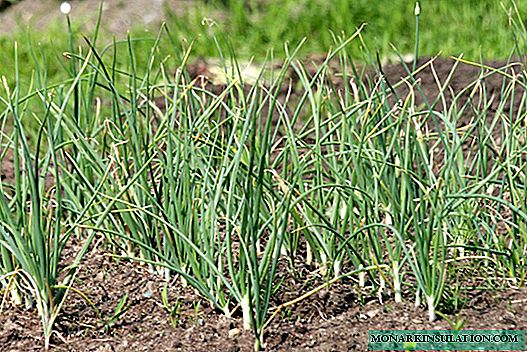
- Open horizontal bed. If you want to plant strawberries in 1 row, then the width should be 40 cm. If you plan a bed in 2 rows, then its width should be 80 cm and the distance between the rows is 30-40 cm. The holes for strawberries should be at a distance of 20 -25 cm apart. On the sides, you can strengthen the bed with boards or pieces of slate.
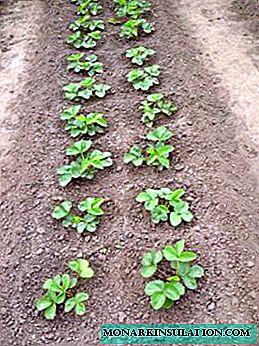
On a horizontal bed, strawberries can be arranged in 1 or 2 rows
- Warm bed. At the selected site, dig a trench 40 cm deep. Fill it: the first layer - large branches previously chopped; the second layer is plant waste: straw, dry leaves, sawdust. Pour this layer with warm water; the third layer is fertile land.
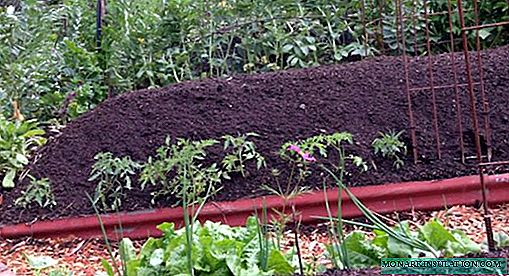
A warm bed will provide strawberries with favorable growth conditions
- Greenhouse bed. Such a bed will need to be made to residents of the middle lane and northern regions, since the strawberry San Andreas does not grow well with insufficient heat. In a glass or polycarbonate greenhouse, install a box with a height of at least 70 cm. Fill it: lay the chopped branches (you can use the remaining ones from the trim), humus, fertilized soil on top (at least 20 cm). Rows and holes should be located at a distance of 20 cm from each other.

Heat-loving strawberry varieties need to be grown in a greenhouse


Transplanting
Do not forget to harden the seedlings before planting in the ground. To do this, within 2 weeks, take it out into the open air, first for half an hour, gradually increasing the time spent.
Spring landing
Typically, spring planting is carried out from mid to late May to avoid the threat of freezing frost. It is better to plant strawberries on a cloudy day. The technology is as follows:
- On the prepared bed, make holes 7-10 cm deep.
- Fill them with humus and moisten well with a solution of potassium permanganate.
- Place one plant in each well. An hour before planting, seedlings need to be well watered. If it grows in peat pots, then you do not need to remove the bushes.
- Gently add strawberry roots. The apical kidney should remain on the surface.
In the first year, it is recommended to cut off all the flowers so that the strawberries can get stronger.
Autumn landing
Currently, planting repairing varieties for the winter is becoming more widespread, as it allows plants to take root and grow stronger, avoiding problems with pests and diseases. As a rule, landing is carried out from late August to early September. Planting technology is the same as in the spring, but without the introduction of nitrogen fertilizers.

When planting strawberries, you need to leave the apical bud on the surface
Agricultural technology of repair strawberries
To ensure the high yield of strawberries in San Andreas, you must carefully care for it.
Watering
After planting for several days, young plants need to be watered daily, and once they get stronger, once every 3 days. Last year's bushes should be watered for the first time in late April. In May and June, moisten the strawberries 4 times, in August and September 2 times are enough. Use only warm water, carefully water the bushes under the root, carry out the procedure in the evening.
Be sure to loosen the soil around the shrub, especially after watering, to avoid the appearance of a crust and nourish the soil with oxygen.
Top dressing
Do not forget that you need to plant seedlings on a fertilized bed. If your strawberry is a year or more, then the feeding scheme will be as follows:
- in May, fertilize strawberries with urea (10 g of fertilizer per 10 liters of water);
- in the second half of June - with a solution of chicken droppings (1 part organics per 20 parts water) or manure (1 part organics per 10 parts water);
- an ash solution will also be useful (pour 2 tbsp of ashes with boiling water, leave for 3 hours, and then dilute in 10 l of water. 0.5 l is needed for each bush) or applying dry flakes (0.5 kg per bush);
- In the fall, fertilize San Andreas with a special fertilizer (for example, Autumn).
During the season you need to spend 10 complex dressings, otherwise the plant will weaken by the fall and will not tolerate wintering.
Mulching
This event will save you from frequent watering, since moisture will be better retained in the soil, protect the bed from weeds, prevent the leaching of nutrients from the soil and maintain its required temperature. For mulch, straw, peat, sawdust or pine needles are suitable. The mulch layer should be at least 5 cm, and from time to time it needs to be updated.
You can also mulch the bed with agrofibre. If you decide to use this material, then make all the necessary fertilizers, cover the bed with an overlap, the pieces should cover each other by 20 cm. Fix the agrofibre with brackets. In those places where you will plant seedlings, make cross-shaped incisions.

Agrofiber will protect berries from decay
Winter preparations
It is advisable to prune remontant strawberries in the fall. Cut off all the leaves and peduncles, trying not to damage the apical buds, from which new leaves are formed. Cover the bushes with spruce branches at the end of the season, as this strawberry does not like cold weather.
Strawberry Pest Control San Andreas
San Andreas is susceptible to certain diseases, including powdery mildew and spotting. Gardeners also note that the plant is often affected by aphids and strawberry mites. Basic information on the treatment of lesions:
- With powdery mildew, the shrub is covered with a light coating, which then turns brown. Leaves curl and fall. Yields are greatly reduced. For treatment, use a solution of colloidal sulfur (100 g of powder per 10 l of water). Remove heavily affected shrubs.
- White spotting. The main symptom is the appearance on the leaves first of brown, and then white or gray in the center and surrounded by a dark border of spots. Affected leaves dry out, the plant weakens. For treatment, Bordeaux fluid is suitable. To prepare it, mix 300 g of copper sulfate with 1 liter of boiling water and 100 g of lime with 1 liter of boiling water. When the mixture has cooled, add 8 L of water and strain. Repeat if necessary. Remove severely affected leaves.
- Aphid. To combat, use an ash-soap solution. It is prepared as follows: Sift 300 g of ash, pour boiling water and boil for 25 minutes. Then dilute in 10 liters of water. To make the solution stick better, add 50 g of soap.
- Strawberry mite. This pest is also capable of causing great damage to your landings. In case of damage, the leaves are curled and covered with a yellowish coating, the berries are smaller and dry. The affected shrub can hardly tolerate winter. For the fight, use Fufanon preparations (15 ml per 5 l of water), Kemifos (10 ml per 5 l).
Photo gallery: strawberry diseases and pests

- Powdery mildew can quickly destroy the bush


- Aphids greatly harm the development of strawberries

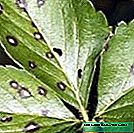
- White spotting usually appears on strawberry leaves

- Strawberry mite is often found in garden areas.

Gardeners reviews about the variety San Andreas
When compared with Albion, it looks more preferable - the bush itself is much more powerful, the root is much better, more resistant to spotting and other common diseases and pests of garden strawberries (strawberries). Flavoring is almost at the same level, but the density is lower, it is more fleshy and juicy, with higher sugar accumulation. And the most important advantage is productivity. On one bush up to 10-12 peduncles. Sowing is slightly lower in the San Andreas variety than in the Albion variety, but the formation of whiskers occurs simultaneously with fruiting. This strawberry is highly resistant to weather and disease, and also stably bears fruit in the summer in the heat without additional shading.
Luda Avina//sadiba.com.ua/forum/showthread.php?t=17270
San Andreas experienced last year and this. Received seedlings from England. So I'm sure of the quality of planting material. But I do not like this variety. The berry is not lined, not very beautiful, often gibberish. Albion against the background of CA is much more beautiful in berry, always beautiful, aligned and shiny berry. Also, in SA, the berry is soft and, as for me, tastes much worse than Albion. There is no that sweetness and depth of taste that is on a fully ripe Albion. On the yield of SA, I also have questions. Somehow she does not shine. Although I specially planted a couple of bushes in a good peat substrate in pots + fertilizing + stimulants, but even with very good care, the yield was mediocre.
Tezier//forum.vinograd.info/showthread.php?t=3054
With the cultivation of strawberries San Andreas even a novice gardener will cope. Follow all the instructions, and the berry will delight you with a quality crop.